Wednesday, February 13, 2013

Seeing Red

Wow feels like forever since I've posted anything. I blame the holidays and the fact that we've been mid-project since December so there just hasn't been a whole lot of anything worth sharing (we are working on completely redecorating our master bedroom and bathroom, and it's been a months-long process). But today I wanted to share some pictures of a super simple, easy update in our kitchen that makes me super happy.

See, we've had this ugly knife-block for years.


I never really enjoyed the way it looked, espeically in our newly updated kitchen that makes the light wood stand out like a sore thumb (a really boring, sore thumb), but also never thought twice about doing anything with it or to it until Pinterest gave me a lightbulb moment... PAINT IT. Duh. After sufficiently face-palming over the fact that I had never thought of that on my own, I got to work thinking about what color to make that bad boy.  And in a risky move I went with....


RED.  Red definitely did not come to mind initially as a possible color choice.  My initial thoughts were colors that would be super matchy-matchy with the blue and brown tones. I was thinking deep, warm jewel tones like a nice forest green or eggplant purple.  Those would have been nice too, but also rather predictable and JCPenny-esque.  Red came to me as an idea after I randomly happened to notice the small pops of red that were already in place in the kitchen and living room...


My brain tends to yell 'MERICA everytime I think of red and blue together, which is partially why I never thought of red in the first place, but I realized that the lighter, non-'MERICA shade of blue in the kitchen and living room did not paint quite as patriotric of a picture when paired with the red as I had feared. Rather, it's a super fun, funky and unexpected pop of color in an otherwise low-key space.  I love it. Particularly because it then inspired this...


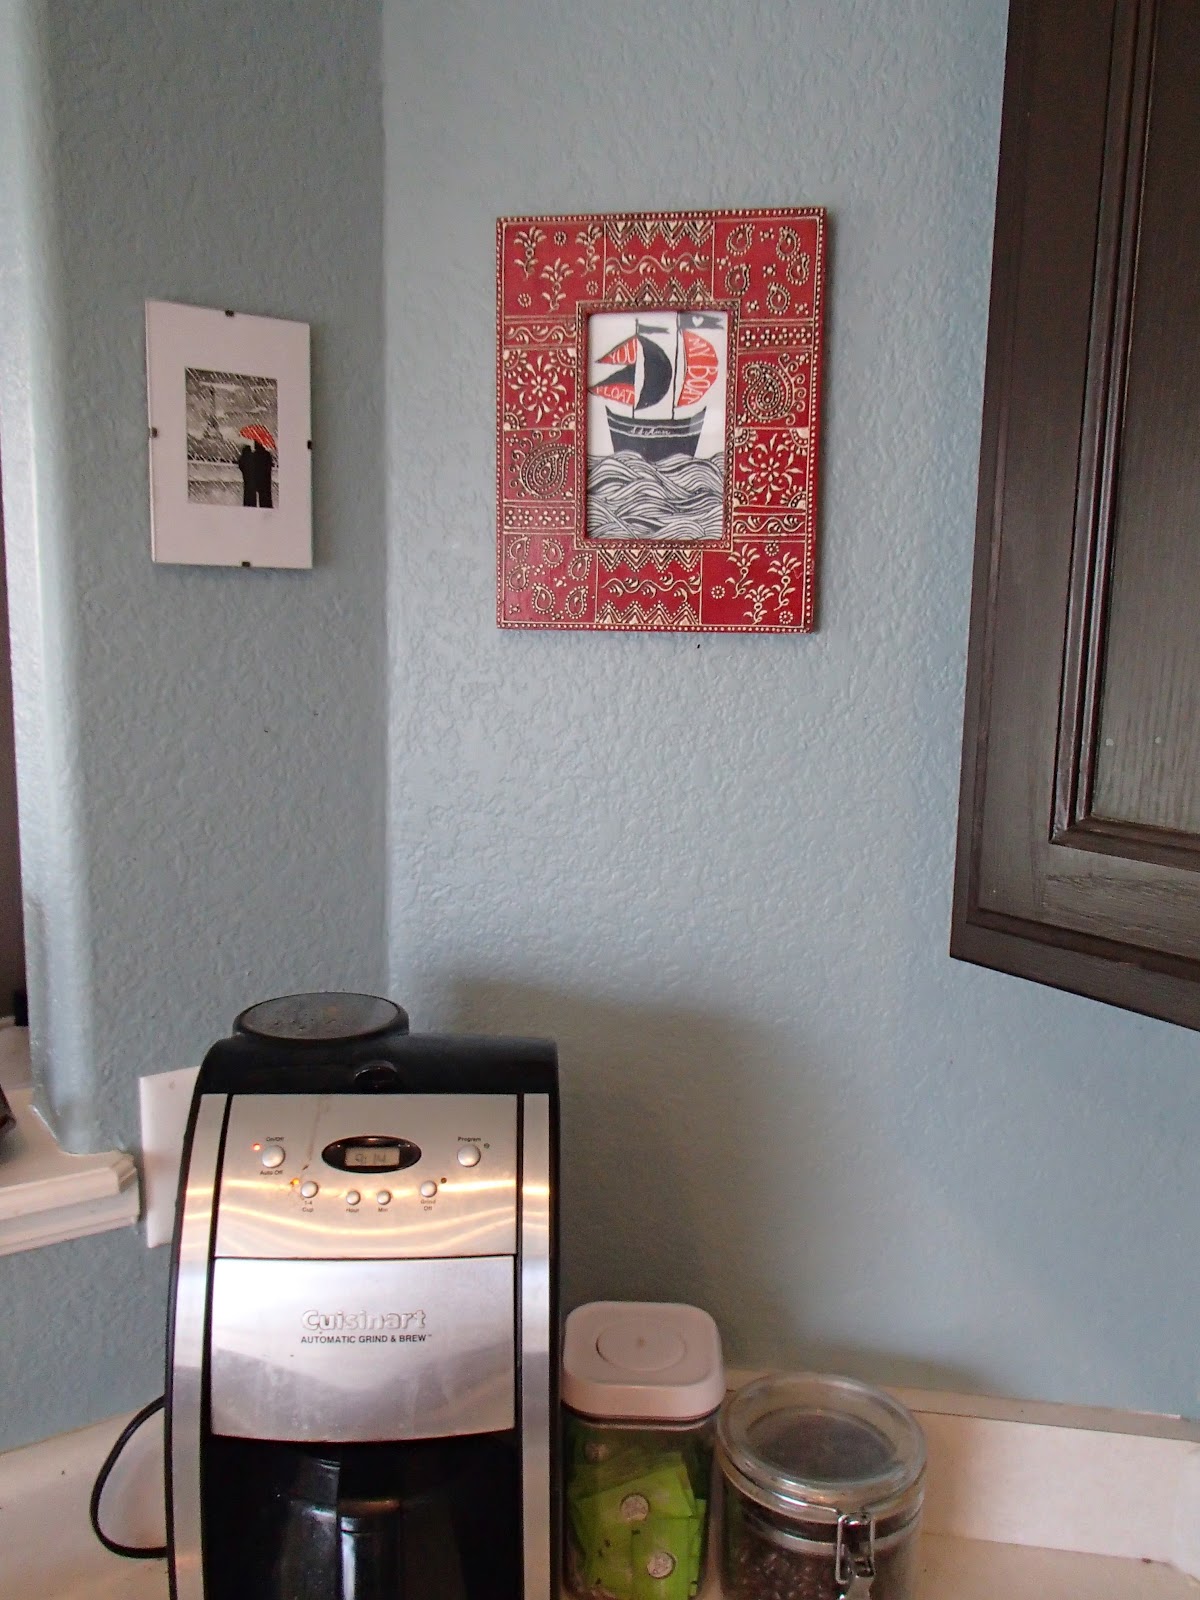
This came to be in a really random way.  As you saw above, the umbrella picture was always there (and played a big role in motivating me to go red with the knife block).  Then, while hunting through a basket of stuff in our yet-to-be-unpacked "office," I found that boat print, which is actually a card Phil got me for our anniversary last year.  I thought it was an awesome card and noticed immediately that the red flags matched the red umbrella almost perfectly.  Another lightbulb went off in my head (my head was getting pretty bright by now), and I knew it needed to join the umbrella picture in the kitchen.  Initially I stuck it on the wall unframed, but quickly realized that looked way too random and unfinished. Then yet another lightbulb went off (you might want to grab your sunglasses at this point) and I remembered we had a gorgeous red frame sitting unused in the basement.  Bada bing bada boom, we now have even more awesomely funky red pops in the kitchen that make the knife block seem totally not random and it all just makes sense now. And I love it! Oh and in addition to the sentiment of the boat card Phil got me, that umbrella picture is very sentimental as well.  Phil bought me that print when he visited Paris with his family a looong time ago, back before we were even dating (back during the time when we were really good friends, and knew we were head over heels in love with each other, but kept fervently denying it to ourselves. And each other. And our friends. And our significant others at the time. Yikes. Let's not go there).  So not only does the red = super funky and awesome color pop, but that little corner of the kitchen is now also full of sentimentality and warm fuzzy feelings of love.


See how well the red ties together now? Now if only I had some less boring, fugly kitchen towels. It's on the to-do list, I promise.

So there you have it. This update cost me a whopping $0, given that we already owned the frame and the card and the knife block.  The red paint was lovingly offered up by my friend Megan who made the mistake of buying a gallon of paint for her fully-windowed french door (and therefore had ample leftovers to share). 

Lesson(s) Learned: Don't be afraid to go bold with colors! Especially in a more neutral space, unexpected color pops can turn your place from drab and nothing special to super unique and fun and YOU.  And as with most house projects, patience is a virtue.  Take some time between your lightbulb moment and actually executing a project... you never know what kind of awesome inspiration might come your way during that period of time!

This post reminded me that I haven't shared the befores and afters of our kitchen yet! You've seen some hints of the "after," but I'll have to show you the before as soon as our kitchen is clean enough that I can take some more pictures of it. Don't hold your breath.... but I do have yet another chapter in the Book of Red to share very soon. Get excited.

Thursday, January 17, 2013

Thrift Store Win!

Phil and I made the rounds to our favorite thrift stores this past weekend, and came out with some sweet, sweet deals...


Everything you see on that table cost us a whopping $50 total.  That might sound like a lot, but most of that $50 went towards that painting you see on the left with the sunset scene.. that sucker ran us $35, and we splurged on that guy because we are planning to paint a favorite quote onto it ala this awesome project that inspired us. We've been searching and searching for an old, cheap painting that we liked enough to stencil over so when we finally found one we agreed on, we figured the $35 price tag was workable.  So that means we got the rest of our loot (3 frames, 2 shadow boxes, a wine rack and a big ball of jute) for $15.  Those frames and shadow boxes all ran us $1 each, on average, with most of them being discounted, the wine rack was $3.50 and the ball of jute was $2.50.  What are we going to do with all of it, you ask? And why on earth did we buy such hideously ugly stuff, you also may ask?

Well none of what you see here will stay as-is.  Like I already mentioned, the sunset painting will have a quote stenciled over.  The rest of the frames and shadow boxes will be painted/stained/altered and the content will be replaced with something personal.  Then they are all going up on the wall that is directly adjacent to our front door, to make the beginnings of what will eventually become a giant frame wall.

The wine rack is going to be painted and turned into a yarn rack to store all of my yarn in an organized fashion (instead of throwing it all in a bag where it gets tangled and impossible to sort through).

The ball of jute is going to have endless crafty possibilities.... from gluing it around a frame, to making tie backs for curtains to wrapping it around cans, jars or vases, that $2.50 ball will last me through quite a few awesome projects TBD.

So that was our successful trip to the thrift! Although the one sad-faced part of the day was that I did have to walk away from this beauty...


Most of you probably think that sucker is hideous, but I have a serious affinity for 1970's decor and art.  This was labeled as being an original 1976 painting, and the second I saw it I wanted it. Bad. But Phil is one of those many who thought it was hideous and wouldn't let me adopt it. Wah wah wah..... oh well. It will live on forever in my dreams, though!

Lesson Learned: It's worth the intense brain power required to sort through thousands upon thousands of items in a thrift store to score some awesome, inspiring deals.  Also, it's hard these days to go to a thrift store and not hear this in my head the whole time... 

Anyone else score sweet finds at a thrift store recently? Got any favorite thrift stores that are sure to deliver?

Tuesday, January 8, 2013

A Trip Down Memory Lane

When updating my frames with some new pictures the other day, I realized that I have a habit that may be worth sharing.  Maybe everyone does this, but if not, everyone should.  Basically, to whatever extent your frames allow, a fun way to have periodic trips down Memory Lane, straight through the heart of Nostalgiaville, is to keep any pictures you replace in your frames hibernating behind your new picture. Bonus points if you keep a consistent subject in said frame (i.e., a child, a pet, a particular friend or group of friends).  Instead of taking old photos out and throwing them in an old shoebox somewhere, let them renew their lease in your frame....

Nest pictures behind each other in a frame for a surprise visit from the past each time you open it up!
What this allows you to do is get a surprise visit from your old pictures, and witness the development and growth of the subjects over time every time you open the frame to pop in a new picture.  My parents did this with my yearly school pictures when I was growing up, and it was so fun to get to see them in succession each time a new one came along. So I've found myself doing this with my picture frames as well, and enjoyed watching my timeline with my best friend Kristen develop when I added an updated picture of us today...


The top picture is circa 2006, middle picture is circa 2009 and the bottom picture is from this past summer. It warmed my heart and brought back fond memories to find the top picture tucked behind the middle picture (which had been front and center in the frame until today), and it will warm my heart next time I add a new picture to see one more to reminisce over (and so on for years to come...).


It's my little secret that that picture frame holds a little piece of friendship history!

Lesson Learned: While no one else may ever know, it's super fun to have hidden pieces of nostalgia and sentimentality scattered about your house, and nesting old photos behind each other in a frame is a fantastic way to do just that!

I'm genuinely curious... have any of you ever done this, or is this a relatively novel concept for most people?

Monday, January 7, 2013

Good Things Come to Those Who Wait

We've tried our hardest to ascribe to the philosophy that patience is a virtue when it comes to filling our house with things we love. Our instincts have at times told us to run to the nearest big-box home store and just fill our house with what we need right away, in the spirit of not feeling like we are perpetually living in an unfinished space. We've held out, though, and worked with what we have, trusting in the house-powers-that-be, and that we would stumble upon the right pieces at the right times. And, behold!  In the case of our kitchen storage dilemma, we were rewarded!

See, we have this gap of empty wall space between the window in our kitchen and the sliding door that leads out to the sunroom. A gap just begging to be filled with something. We knew right away we wanted to use that little space (which is about 3 feet wide... and, again, I failed to take a before shot of this particular spot so I can't show you what I'm talking about without spoiling the surprise) to add some counter space and storage to our kitchen. Initially, we filled that spot with a console table/wine rack we've had for years that we used to use in the entry way of our apartment as a spot for keys, mail, etc.  I also have no pictures of what it looked like in that spot, but here it is in it's new (and temporary) home, just so you have a visual of what we were working with for the first 5 months or so....


As you can see, it provides a teeny bit of "counter space," (it's only about 10 inches deep) and zero storage space (except for wine, of course).  Suffice it to say we were perpetually in the market for something that gave us a little more help in the kitchen.  We wanted something along the lines of this, your average "kitchen cart:"

Problem was, these puppies tend to run $200-400+, and we went months without finding anything that was affordable. Until we stumbled upon this pretty lady at a local flea market:


Isn't she beautiful? (Excuse the Piper photo-bomb).. we love this piece, and we didn't have to do a thing to it.. we were lucky enough to find something with the refurbished DIY look we love, without having to do any of the grunt work, and for a mere $75! We were initially thinking we might want to paint it, because we weren't sure how the green would go in our blue kitchen, but we kind of love the unexpected color pop, and think that the colors actually go just fine with each other.  Also doesn't hurt that it's forcing us out of our sometimes matchy-matchy instincts. Here's a different perspective to better show you how it fills our gap...


A perfect fit, no? And just enough space to give us decent workspace on top, two more junk drawers (because everyone needs more junk drawers!), and we've finally found a resting place for our oversized boxes of Costco goodies that previously lived as eyesores above our cabinets. Now let's revel in it's beauty with some close up shots...


She's sporting some gloriously unique and vintage hardware that I loooooove...


LESSON(S) LEARNED: Patience, grasshopper! It pays to hold out for that special moment when you stumble upon the perfect piece for the perfect price at the most unexpected time, in the most unexpected place (did I just write a Dr. Seuss poem?!). Also, turn off the ugly date-stamp on your new digital camera. (Yikes, sorry about those eyesores mucking up all the pictures)

Anyone else had similarly serendipitous run-ins with the Perfect Piece?

Tuesday, December 11, 2012

The Great Trim War of 2012

The previous owners of our house clearly did some specific things to ready the house to sell. With the best of intentions, I'm sure, they did things like paint every dang wall of the house a bizarre pinky-peachy-off-white color (I can just hear a realtor saying "buyers like to see neutral colors blahblahblah").  But one of these things has driven us absolutely bonkers and we wish we could go back in time and somehow psychically know that we would one day buy their house and ask that they not do what they were about to do.... this thing would be coating the wood trim, which is found in EVERY ROOM OF THE HOUSE (except the basement) with some sort of heavy duty, glossy lacquer.


Not only is it an eyesore (I hate the color, and the fact that it's so dang shiny just rubs me in all the wrong ways), but that lacquer was meant to survive the apocalypse, I swear.  At the end of the world, it's going to be cockroaches, twinkies and the trim in our house left to repopulate. And we know this was an after-thought and a special add-on, because they told us at closing that they literally SPRAYED all the trim down with this stuff - we found this out after asking about strange yellow coloration on the ceilings in some rooms, and they shared that this lacquer, over time, yellows and clearly some had gone astray and missed the doors and trim. Grrreeeaaaat.

As I mentioned in this post about our stairway (which matched the lacquered wood trim), we had a heck of a time battling with the trim when we painted the main floor of the house.  In round 1 of the epic battle of Us vs. The Trim-From-Hell, our weapon of choice was a liquid de-glosser, because A) we had a bunch leftover from stripping and refinishing our kitchen cabinets (and we are of the thrifty, use-what-ya-got variety), and B) we thought it would be easier and less messy than sanding. Well we learned our lesson big time, and made the mistake of allowing the main floor of the house (which accounts for at least 60% of the total square footage in the house) to be our guinea pig. I'll try to summarize why this was such an epic fail as succintly as possible....

For starters, using the liquid de-glosser is not exactly "easy" or "simple." It involves scrubbing the trim with the de-glosser, [with just as much elbow grease (if not more) than sanding requires] and following with a damp cloth to remove excess lacquer and de-glosser (again, also required by sanding).  Really no fewer steps or less physical labor than sanding would have been. While not as messy in the sense that there was no sawdust flying everywhere, I did have to deal with the multiple heart attacks that came with accidentally dripping the de-glosser onto the hardwood floors. Oh, and because the trim in our house is so old (and not in great shape - if we were loaded I would have sprung to just replace all the trim), there were areas where the wood had splintered, and I ended up with one heck of an epic wood splinter that shot straight through my scrub pad, through my rubber glove and into my flesh while I was scrubbing. Like, all the way. And it was so big, I kid you not, I used PLIERS to remove it from my finger.

So, the process was not so easy or simple.  Blood and tears were both shed.  And the results?! Oy. Makes me cringe. So, the de-glosser did not sufficiently strip the lacquer.  It might have after a few more go arounds with the de-glosser, but we didn't know any better and were into the idea of moving forward with the project, so we ignored the fact that the trim was still quite shiny and smooth (less so than before, but looking back, clearly not ready for paint). When it came time to paint, we quickly realized it was NOT good enough, and the de-glosser had NOT done it's job.  The paint went on super streaky, and required 3-4 coats of paint with built-in primer before it was covered, and it STILL leaves a lot to be desired. If you look closely, visible streaks where the paint has not fully covered the trim are in abundance.

Streak-city.

And.... (hold on a sec, talking about this part gets my blood boiling... deeeeeep breeeeaaaaths)... when all was said and done and we started removing the tape around the trim.... the paint PEELED off the trim in MULTIPLE spots.  Like, almost everywhere you look, you can see little spots where the paint peeled off. Now, it's just at the edges, where the tape met the trim, so it's not massively noticeable unless you are looking for them, but I know they are there and they drive me insane.  In addition, the paint chips and peels from normal wear-and-tear crazy easily... just a little ding or scratch makes the paint come off.


UGH. Talk about heartbreak hotel when we realized how shoddy of a job we had done in the biggest, most seen and most used parts of the house (and again, most guests don't notice because it IS just trim, after all, but WE notice and that's all that matters).  SOMEDAY when we recover from this devastation, we will either A) touch up the trim where it has peeled/scratched off B) do another coat on all the trim just for good measure and to get rid of the streaky effect and/or C) just plain replace all the trim with something that's higher quality and that we can paint pre-installation.  But moving forward, we are remembering what we have learned and being sure to conquer new spaces with a whole new strategy.

Us vs. The Trim-From-Hell, Round 2! We have a new weapon in our arsenal this time.... SANDPAPER. 80 grit sandpaper, to be exact.

That's right, after our massive failure with the de-glosser we decided to bite the bullet and try sanding the trim in our bedroom instead.  While the bedroom is a smaller space, so it is inherently a smaller and less aggravating project, the consensus so far is that sanding is the way to go! It's actually no more work than using the de-glosser, and you get MUCH better results, almost immediately.  Just a couple rounds of sanding got the lacquer good and gone.  As for the mess, yes, we ended up with sawdust everywhere but a quick round with the vacuum took care of that.  We haven't started painting the trim yet (we are working on the second coat of the walls right now), but when we do we are 99% certain it will go off without a hitch.  Just the difference in what the trim looks and feels like after sanding, compared to using the de-glosser, tells us that we did it right this time (after using the de-glosser, the trim was the same color and only slightly less glossy and smooth, whereas after sanding, the trim is noticeably lacking a significant amount of lacquer, as evidenced by the significant change in color and texture of the trim). 


Lesson Learned: When dealing with heavy-duty, stubborn stain, gloss or lacquer, SANDING is the only way to go.  De-glosser may have it's place, but this is not it.  We are official converts. We will never doubt the power of sandpaper ever again.

Anyone else have similar struggles with stripping (trim or furniture, etc.)? Has anyone else struggled with de-glosser, or conversely, has anyone had major success with using de-glosser (if so, what is your secret)?

Monday, December 10, 2012

It's Beginning to Look A Lot Like Christmas

No thanks to Mother Nature, of course.  Still waiting on some SNOW to help fuel the festivity of the season. But in the meantime, our house is looking quite in the holiday spirit! (Bad photography warning...)
There's the streeview at night. Given that I'm still only working with my phone camera at the moment, night photography is inherently going to suck. But you get the idea! You can barely make out the colored lights on the pine tree to the right of the house, but they're there! We would love to do more over time, but we've realized that in order to avoid spending hundreds of dollars this year, it makes sense to add elements year to year, instead of trying to go all out right off the bat.  Even the "little" that we did do this year took 3-4 spools of white lights plus 4 strings of colored lights for the tree. 


Word to the wise, LED lights are crazy BRIGHT! Be forewarned that you may light up the entire neighborhood if you rock the LED en masse.  


Here's what our front door is sporting as of right now.  I like that it kind of jives with the snowy white on white theme we seem to have inadvertently fell into, but it does kind of bother me how un-Christmas-y it feels. It would also bother me to have crazy red and green everywhere, because it would SO not match with the blue of the house, so I'm kind of in a lose-lose situation here. I really need to let go of some of my color coordination OCD issues, so I can find a more festive way to dress up our front door for future years. In the meantime, though, it does say WINTER and it goes great with our cool-white lights, so it's fine for now. :)

As for the whole LED vs non-LED, cool-white vs. warm-white debate....  obviously we landed on LED cool-white lights, and for a variety of reasons.  1) LED lights save on the energy bill, so we loved that idea. 2) The cool-white LED lights came in giant spools for a good price.  You can get warm-white LED lights these days, but not in bulk, and they are more expensive so it would have been much pricier to go that route. Also, I do love how the cool-white matches the cool blue of the house. I never thought twice about matching your Christmas lights to the color of your house before, but this is yet again another sign of how OCD I am about colors matching. Plus, the lights are so bright that you really can see the color of the house at night, so it does make me happy that it doesn't clash.

PUBLIC SERVICE ANNOUNCEMENT:  Do not EVER mix cool-white and warm-white lights.  It's a huge pet peeve of mine when people do that -- just because they are both "WHITE" doesn't mean they are actually the same color, or that they look good together!!! See Exhibit A:

See? NOT the same color, and they clash crazy bad. I don't understand how people can mix and match and not see how bad it looks. And it happens a lot. So please, please. Don't do that.  (And no offense to anyone out there reading this who may have done this... I respect that some people dig it, we'll just have to agree to disagree!)

As for the process of getting those bad boys on the house, this was the first time that Phil or I had ever put Christmas lights on a house before (wrapping a strand or two around our apartment's patio railing was about as far as we'd ever gotten), so it was a new learning experience for us.  I had imagined just gaily sticking up lights while singing Christmas carols and drinking hot cocoa without a care in the world. But, turns out, hanging Christmas lights (at least as a first-timer) is a hard, painstaking, frustrating, bickering-inducing process.  We started with a general plan and idea for what we wanted to do, but quickly found out that there are a lot of details to hammer out before you can actually start... 

Where will they be plugged into? Where do we need  extension cords? Where should the lights start? End? Where exactly on the house should they hang from? How many strings of lights do we need? How can we get them to all connect to each other without shorting out fuses? Why are ladders so scary? Why isn't this enjoyable?

The questions that were unanswered when we first stepped onto the roof seemed to be endless.  But we finally got it figured out.  We started with the plan to staple the lights onto the siding/trim of the house (this was just always how I knew my dad used to do it so I figured it must work).  Well, whether it was our lack of staple gun skills, or our weak staples, it didn't exactly work out. So after one of our many short bicker-sessions of that day I finally conceded that those plastic roof clippy things were the way to go:


I was against them at first because a) I was trying to be thrifty and not spend any more money than we had to (we already had staples on hand, but luckily you get a box of about 75 of these for less than $5 so it actually wasn't so bad) and b) I had a preconceived notion that they are tacky and make the lights hang weird and are too highly visible as big plastic things hanging off your roof. I admit, I was wrong. They're only noticeable if you are looking for them, and certainly only noticeable in the daylight. I started paying attention to how other people hung their lights, and realized most of them use these clippies and I never noticed them until I started looking for them. They made hanging the lights a breeze, and kept us from poking tons of holes in the siding of our house.

Another problem-solving opportunity we got was when we realized we needed to connect the snowflakes hanging from the garage to a power source.  The cord couldn't reach to the nearest connection point of the other lights, and all of our outdoor extension cords had 3-pronged ... plug-in-thingies (what the heck are those called?!), so we couldn't plug them back into the rest of the lights that were nearby.  We also didn't want to run a long extension cord all the way from the roof across the front porch or into the garage to plug them directly into an outlet, nor did we want to risk throwing an indoor power cord on the roof, exposed to the elements.  You see the conundrum here, I hope. But luckily Phil had a stroke (of brilliance), and we came up with this:

That's right, that is a string of random blue lights we've had on hand, that we popped a bulb out of (thereby rendering it dead), and used as a makeshift extension cord. We were pretty proud of this solution, seeing as how it saved us from having to risk major electrical hazard and/or spend more money to buy the appropriate extension cords.

So there is an overly detailed explanation of our outdoor Christmas decorations.  I'll post soon about what we've done inside, including our tree and the whole debate surrounding that (chop our own tree versus pre-cut tree versus live tree).

Lesson(s) Learned: There are a lot, where do I start? 1) Hanging Christmas lights is HARD and only the most solid of relationships can survive it.  2) Unless you are rolling in dough, patience is a virtue when it comes to building up your lights display over time. Start small! 3) The plastic clippy things are a worthwhile expense. 4) Unused strings of lights make great makeshift extension cords. 5) I really don't like climbing ladders.

Phew that was a lot of learning. Anyone else learning valuable lessons about hanging Christmas lights? Any tips from seasoned homeowners on how to make hanging lights as stress-free and easy as possible? We're hoping that next year will be easier simply due to getting this first go under our belts. Fingers crossed!

Tuesday, December 4, 2012

Stairway To Heaven

The stairway leading up to the 2nd floor in our house is a prominent feature, considering it is open to the main floor (so you see the entire stairway and the upstairs hall due to two-story-high ceilings), and it is directly inside the front door.  So it's transformation is pretty important, especially considering it started like this:

Ignore the painters tape (I remembered to get a before shot, but not before we started taping everything, obviously. Progress.) The entire house was the color you see there - which is an off-white-pinkish-peachy color.  And all of the trim is that shiny golden oak color.  Never for a second did we consider leaving it like this (well, Phil grappled with the concept of leaving the trim as is, but there was no way I was having that).  I knew right away I wanted that trim WHITE. I love the crisp look of white trim with dark walls. The main floor got a warm, chocolate-milk color, and the stairway was slated to get that same color. But Phil and I together came up with the idea to have a fun accent color on the stairway.  So a couple weeks later we had this:

 The lighting in that room is tough, so this picture doesn't quite do it justice, but you get the idea.  You can see the chocolate-milk color on the wall to the right and in the upstairs hallway. And then as you can see we went with an eggplanty purple for the accent wall. And I pretty much am in love with it. I just adore the deep, warm colors with the bright white stair railing.

However, if I think back to the process of getting it like this, I want to punch things.  That shiny golden oak trim? Covered in some sort of heavy duty shellac. We used a liquid de-glosser on all the trim in the house, and it was just not enough to get through whatever industrial grade shellac they used. We really should have sanded the trim.  The trim ended up taking 3-4 coats total, and has already peeled/chipped off in places... so it clearly just did not adhere to the trim well enough. Oh well, ya live, ya learn!

Lesson(s) Learned: When it comes to heavy-duty stripping, liquid deglosser is a no-no! It might be more laborious and messier, but SANDING is the only way to get things fully prepped for painting, assuming you want it to really last.

Has anyone else learned a similar lesson, or had more success with liquid de-glosser than I have? Any tricks of the trade to make de-glosser work better?